

This is a simple guide to setting up a USB pen drive with Tiny Core Linux on it. It's just a 'get you going' description for those who are totally unfamiliar with the process, and is intended to get you to the stage where you have something that you can use to explore the capability of those thin clients that will boot from USB.
In parts this description assumes that your main working environment is Windows. (If you're a Linux Geek you probably don't need to read this guide!)
You obviously need a pen drive. Tiny Core is not a large distribution, but you'll also need space for any extensions you decide to add. I currently have a number of cheap 1GB drives that I got from eBay, but almost anything that's 64MB or over should do. For this update I happen to be using a 2GB one.
NB: At least one of the utilities mentioned below refuses to put the distribution on a pen drive that's smaller than 1GB. You may have to rule that one out if you are wanting to use an old 256MB pen drive for instance.
 Next we need a copy of the latest Tiny Core distribution. This is available from the
Downloads section of
the Tiny Core website. At the time of writing the version number has now reached 8.2.1. There
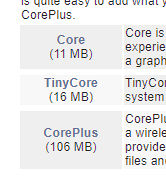
are three variants available - Core, TinyCore and CorePlus.
The first excludes the graphical front end, and the last bundles a load of applications such as support
for a Wireless setup. I usually download the TinyCore option (12MB) and subsequently add
just the Apps I'm interested in.
Next we need a copy of the latest Tiny Core distribution. This is available from the
Downloads section of
the Tiny Core website. At the time of writing the version number has now reached 8.2.1. There
are three variants available - Core, TinyCore and CorePlus.
The first excludes the graphical front end, and the last bundles a load of applications such as support
for a Wireless setup. I usually download the TinyCore option (12MB) and subsequently add
just the Apps I'm interested in.
With my setup the download automatically goes into my Downloads folder. In your case it may be different and you might get a save as... prompt from your browser. Where ever it ends up you'll need to find it later. The current distribution is always named tinycore-current.iso. I find it useful to rename it to the actual version - tinycore821.iso in this case - so you know what's what in a few months time.
Finally we need some way to get the distribution on to the pen drive. There are quite a few options you can use. Here are four of them:
The first two have no installer and execute directly. The last two will install themselves on your computer in the normal fashion and create an entry in the start menu.
When I first wrote this guide there wasn't much to choose between them. Some did it all for you, some needed a slight tweak afterwards. If you have problems with one then try one of the others. core2usb is Tiny Core specific and so should automatically deal with the issue mentioned below. All of them use syslinux as the system loader.
For no real reason I have been using LiLi (Linux Live USB creator) for quite a few years now. It does the job so I've felt no urge to switch to one of the others. Maybe one of them may be a better option? Possibly a revisit is due....
I should also mention that I've found some older BIOSs will not recognise large pen drives. I suggest you use pen drives of 1GB or less to avoid this problem or create a 1GB partition at the start of your pen drive.
I've written a couple of simple guides to putting Tiny Core onto a bootable pen drive:
When you install applications in Tiny Core it puts them in the tce subdirectory. However, if you're running Tiny Core from a CDROM, that media is actually read-only and you cannot store downloaded applications in that directory. At some point in the 4.0 series the Tiny Core developers recognised this and changed the name of that directory to cde for the live CD version to indicate that it was non-writable .
All the installation applications basically unpack the Tiny Core ISO image, copy the files across to the pen drive and then install syslinux to make it bootable. This means that at some point the cde directory needs to be renamed to tce. core2usb does this automatically, but if you use any other installer you'll have to do this by hand. (It also may be worth editing the syslinux.cfg file to remove the cde parameter from the boot command line).
All follow a similar path.
Plug your pen drive into a USB port on your computer. Note the drive letter that windows assigns to it. This is critical. This drive is going to be modified so you need to be sure that you're installing to the right drive and not screwing up your main system or any other drives in any way. Most utilities are actually quite helpful here and various various safeguards built into it to prevent you making a mistake - they'll only work on removable drives.
Some of the installation applications offer you the opportunity to format your pendrive before use. If they don't and the pendrive needs to be formatted you'll have to do that yourself - either on another system or using the inbuilt Windows disk tools. An easy option, at least in Windows 7 and above, is to right click on it in Explorer and then select Format.. from the list of drop down options. Next select FAT or FAT32 as the format option.
After that it's a matter of following the prompts.
Having created the bootable pen drive with LiLi I take the following steps:

Next edit the file \boot\syslinux\syslinux.cfg (Windows path separators) and:
The latter tells it to use the UK keyboard layout - but only works after the kmaps.tcz extension has been loaded. (see on). Other small tweaks you might like to make at the start of the file is to change:
After this my syslinux.cfg starts like this:
DEFAULT tcw
UI menu.c32
PROMPT 0
TIMEOUT 60
ONTIMEOUT tcw
F1 f1
....
..and the second entry (default and used almost all the time) looks like this:
LABEL tcw
MENU LABEL Boot TinyCore (on slow devices, waitusb=5)
TEXT HELP
Boot TinyCore with Embedded X/GUI extensions, if using a slow device.
Boot media is removable. Use TAB to edit options for specific needs.
ENDTEXT
KERNEL /boot/vmlinuz
INITRD /boot/core.gz
APPEND loglevel=3 kmap=qwerty/uk waitusb=5 tce=UUID="AC74-38C1"
See below for an explanation about the tce=UUID= entry.
Plug into your thin client and power it up. Hopefully you'll find that you end up in a Tiny Core boot screen, then hit return to boot Tiny Core.
If Tiny Core boots but you only end up with command line interface there two likely causes:
One final thing to beware of is if you have a previous (or current) installation of Tiny Core on the hard drive/flash of the machine you've booted the pen drive on. Left to its own devices Tiny Core searches the various file systems to find its tce directory and stops at the first one it finds. If there is one on (say) /dev/sda1 then it will use that in preference to the one on the pen drive (/dev/sdb1).
Here's an example where I've booted a freshly prepared pen drive on a thin client which already has a Tiny Core installation:
tc@box:~$ mount | grep sd
/dev/sda1 on /mnt/sda1 type ext4 (rw,relatime,data=ordered)
tc@box:~$
We have the /dev/sda1 file system in use rather than the /dev/sdb1 that we want. Note: Another hint that something is not quite right here is that the file system is of type ext4. The pen drive is formatted with a FAT32 file system.
There are two solutions to this:
Option 1 is quick-and-dirty and fine if you're about to do a fresh installation to the machine's drive but not an option if you want to keep what's there. Executing the command:
dd if=/dev/zero of=/dev/sda count=2
will wipe out the partition table and make the installation vanish.
With option 2 we need to add the boot parameter tce=UUID="XXXX-XXXX" to make Tiny Core select the right file system. This is probably the right route to take as it saves you meeting the same problem in the future (with this pen drive).
The blkid command gives us the magic number to use...
tc@box:~$ blkid
/dev/sda1: UUID="5962319a-1189-439c-8ebd-1b117355ba03" TYPE="ext4"
/dev/sdb1: LABEL="TINYCORE821" UUID="AC74-38C1" TYPE="vfat" PARTUUID="d4aa609c-01"
/dev/loop0: TYPE="squashfs"
/dev/loop1: TYPE="squashfs"
/dev/loop2: TYPE="squashfs"
.....
From this we can see that the pendrive's file system (/dev/sdb1) has a UUID of AC74-38C1
You now need to edit the syslinux.cfg file. You can either do this on another system or on this system before rebooting. If doing it on the current system you will need to mount the pen drive first in order to find the file:
mount /dev/sdb1
cd /mnt/sdb1/boot/syslinux
vi syslinux.cfg
For the lines beginning APPEND= you need to add tce=UUID="AC74-38C1" to each of the lines. (You obviously use the hex number shown by the blkid command).
Having sorted this out reboot. Check with the mount command that this time Tiny Core has mounted the file system on the pen drive.
tc@box:~ $mount | grep sd
/dev/sdb1 on /mnt/sdb1 type vfat (rw,relatime,fmask=0000.......
Once I've got a working system the first thing I do is install a few standard applications one of which is the kmaps file to get my UK keyboard working properly. Until I do this I have to remember that the pipe symbol | is the '~' key (shift/#) on the keyboard.
Start the App browser by clicking on the middle icon in the line of icons at the bottom of the screen.
![]()
When the App browser starts for the first time it will ask you whether you want it to find a suitable repository. If you say 'yes' it runs speed tests on a number of them to find the fastest. If you say 'no' you can manually pick one out of the list.
Next click on Apps -> Cloud (Remote) -> Browse to connect to the repository.

You'll end up with a (long) list of apps in the left-hand pane. Type some letters of what you're after into the search window. In this instance we're after the kmap.tcz extension.

When you hit Enter you'll be presented with a (much) shorter list of those apps which match with whatever you had typed in the search bar. Select the one of interest. (In the example below we only have the choice of one!). The right hand pane displays the contents of the App's info file.

If you're happy with what's there click on the Go button to download and install the app.
I normal add a few other Apps such as the pci-utils extension (to bring in the lspci command), and then reboot and check that everything is as it should be.
[Back]