This is a general guide applicable to any thin client with a standard BIOS which can be configured to boot from USB.
 Put simply you need:
Something to Boot: These days it appears that every distribution provides an ISO image for a "Live CD". i.e. You can just write the image to a CD, boot from that CD and you have a running version of Linux that hasn't touched or altered your computer system in any way. No doubt in due course they'll be "Live Pen Drive" systems as well, but they're not so prevalent at the moment. So booting from CD looks like a good starting point. I have Ubuntu, DSL, Tinycore and Puppy Linux CDs to hand.
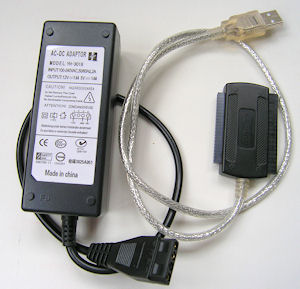
Something to boot from: Many years ago I bought a couple of external USB-connected cases to take 3.5" and 2.5" drives. Very useful for recovering/moving data from old systems and drives but can be a bit fiddly at times. About a year ago I bought a much simpler bit of kit (see photograph) on ebay. With this it is very easy to briefly couple up any IDE drive to a USB port without having to dis-assemble and reassemble cases. (Versions are available that support SATA). For our get-up-and-running purposes all we need is a working CDROM drive - it doesn't have to be anything special and something from an old junked PC will do just fine. In my case I'm using a CD/DVD rewriter that I swapped out from my system when it stopped writing. (It still reads perfectly).
Boot up the thin client and go into the BIOS and set it to boot from USB. Plug the CDROM drive (or whatever) into the USB port and insert your chosen distribution. Then reboot.
If all goes well you'll have an up-and-running Linux system. If not try another distribution. My recent experience showed that Tinycore coped with everything. DSL and Puppy had a few issues with some older hardware.
If all else fails you'll have to start modifying the distribution so that you get a kernel and/or modules that supports the hardware you're trying to run it on.
Once you're up and running it might be a good idea to backup the image of the flash memory before proceeding any further. That way you'll be able to return the hardware to its original thin client configuration should you wish to dispose of it. Making the backup is simple if your kernel can see the flash memory and you either have a spare USB port or can access storage via the network.
Taking the USB case: Just plug-in some storage (hard disk or pen drive) with enough free space on it and run the dd command. After you plug the pen drive in you'll have to mount it if your distribution doesn't automatically do that for you. Let's assume it has been mounted on /mnt/sdb1 and that the thin client's flash memory has appeared as /dev/hda. Then just type:
dd if=/dev/hda of=/mnt/TCflashXX.img bs=512
Obviously you'll want to replace TCflashXX.img by some suitable name of your own. Finally carefully archive that file.
Note: You don't actually have to be able to mount any of the file systems on the flash memory as we're just imaging the entire flash memory (the raw device).
Once you're happy that you don't mind what happens to the flash memory and that it is large enough for your purposes you can go ahead and install the distribution. If there's only very limited flash capacity you'll have to look at the alternative of getting the system to boot from a pen drive, or some hybrid arrangement where the kernel and initrd are in the on-board flash whilst the rest of the system is on a USB pen drive.