

This sequence of photographs shows you how to take a WTx650XE apart. You'll need to do this if you need to to change the backup battery, upgrade/change any of the system flash or RAM or add a PCI card.
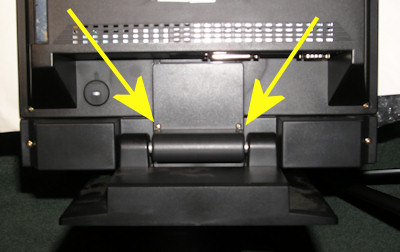
Lay the terminal flat on a table with the stand just overhanging the edge. Remove the two screws that secure the cover over the hinge and its bracket and then remove the cover.
Next remove the six screws holding the hinge plate to the body of the terminal. Carefully remove the base and place it on one side.
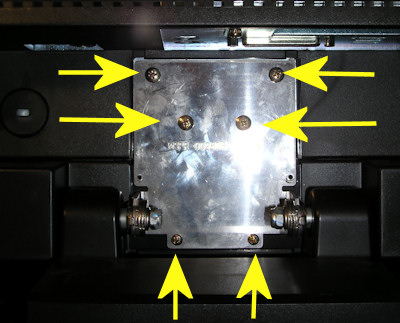
Remove the four screws that secure the cover over the back of the speakers at the bottom of the screen. Remove the cover and place it on one side.
Disconnect the lead that goes to the speakers.
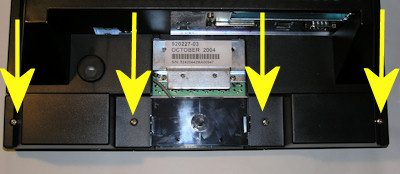
Undo the four black screws that secure the bottom of the back panel to the front panel.
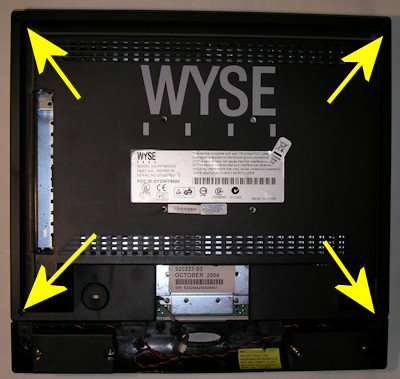
Undo the four screws in the corners of the back panel.
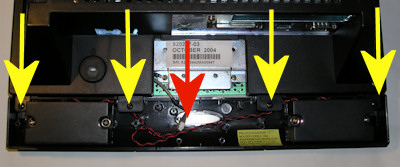
Now comes the slightly tricky bit... The back panel is now held on by a number of lugs on the front bezel that locate into slots on the back panel (see photo). There is a single lug in the centre of each side and three along the top. I gently used a flat-bladed screwdriver between the bezel and the back panel to separate them. Start at the bottom and free each side and then move on to the top edge. Note that the speakers are part of the back panel. (All black plastic is part of the back panel).
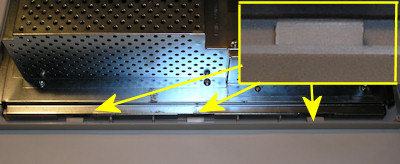
This shows the lugs along the front bezel. The inset picture shows a little more detail of the lugs which locate....
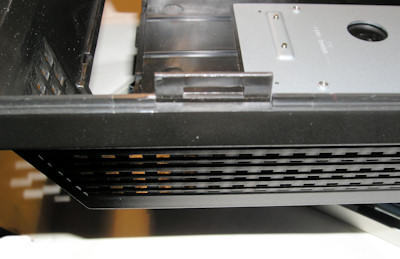
...into these slots on the back panel.

Finally remove the six screws that hold the metal shield over the circuit board.
As always - just reverse the process to re-assemble the terminal.