

With the 67xx vertical and facing you the panel you need to remove is the one to your right. Looking from the rear it is the one by the PCI card slot.
First, with it lying flat, you need to remove the screws at the sides and the back close to the top panel. There are three each side as shown in the photo below:

With the screws out of the way you can lift the cover at the back. The front edge is trapped by some lugs so you need to continue to gently raise the back of the panel until the front becomes clear.

With the side panel out of the way you'll be presented with a metal shield. This should be held in place by six screws. Mine wasn't with four having been lost along away. Remove the screws and then you can remove the panel. It might be worth noting how it is fitted, but usually it has been on and off numerous times before it reached you. In my experience the odds are in favour of the last person to refit it being ham-fisted.
Elements of the rear edge of the shield interleave with the metal work of the back panel. It is fairly obvious how these go.
The sides of the shield slide down inside the sides of the chassis.
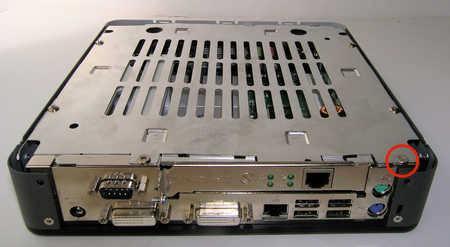
Screws: Most of these were missing from my 67xx. I assume they were all the same in which case they have very slim flat heads. Digging around in my box of computer screws I found one with a slightly thicker flat head and a number with domed heads with a reasonably low profile.
I found that the screw circled in red in the photo above must be one of the original very thin flat headed screws. If it isn't you wont be able to refit the nearby cover screw. I used my slightly thicker flat-headed screw for the other position on the rear chassis rail. The remaining four locations accommodated my slightly deeper round-head screws without any issues.